Knots can be an important part of keeping bees, which is kind of unfortunate for me since I really struggle with both learning and remembering how to tie different types of knots. One beekeeper we went to had issues in the past with lids flying off die to wind. Their solution was to use rope to keeps the lids down and protecting the inside of the colonies, so we had to learn how to tie the knots to properly close up the colonies after sampling. I took a few pictures to help me remember.
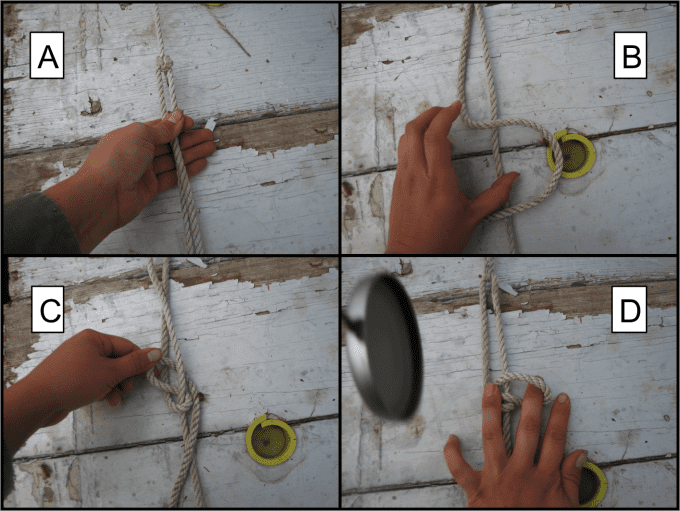
The ropes are long enough to reach under the pallet the colonies rest on and meet on top. One end of the rope has a loop. The other end is just straight. You thread the straight part of the rope through the loop and pull the rope taught. Use your non-dominate hand to hold the rope taught at the loop (Picture A).
Using your free hand, make an S-shape with the loose part of the rope (Picture B). * You will see me using the same hand for both, but that was because I needed a hand to take the pictures. A properly tied rope will need two hands on the rope.*
Bring the bottom part of the S back and under the rope, then through the upper part of the S (Picture C).
Flip the loop over the straight piece of rope and pull a loop of that rope through the other loop (Picture D).
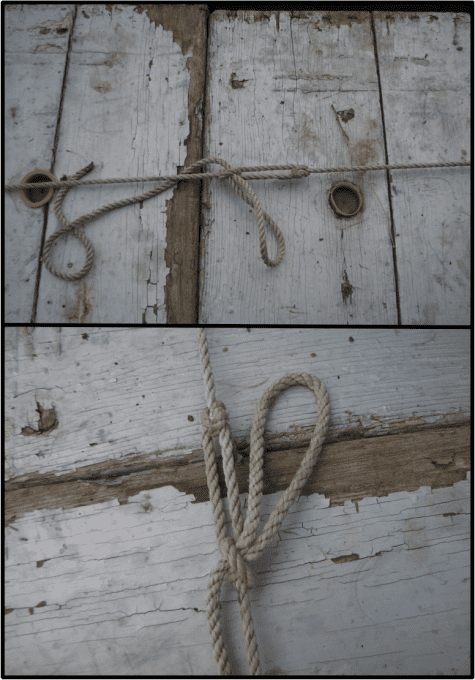
Pull the last loop and the rope to where your non-dominate hand is holding the rope taught. Tighten. You have a knot! (hopefully)
There are lots of instructions (including videos) on how to tie all sorts of knots. I found a new hobby.