 It’s hard to beat a Langstroth hive for its modularity, productivity, and convenience but it can also be interesting to play with bees in a different configuration. I was introduced to bees and learned beekeeping in New Zealand and I’m always looking for opportunities to see bees in new locations and contexts. In reading about beekeeping volunteer opportunities, I came across some different hive designs used around the world where access to materials and budgets are limited and was intrigued by top bar hives (TBH). The beauty of a top bar hive is in the flexibility of design and low cost possibilities.
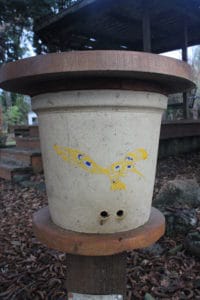
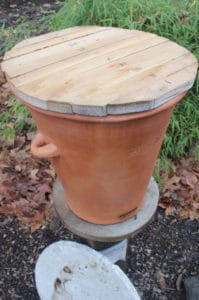
Greeks were early users of TBHs in terra cotta pots prior to the invention of fixed frames.
More recently, horizontal top bar hives have gained in popularity due to ease of construction, design flexibility, and convenience of inspection and manipulation. Now lateral TBHs exist as both beautiful ornate constructions in suburban backyards and in hollow logs or empty barrels in remote parts of the world.
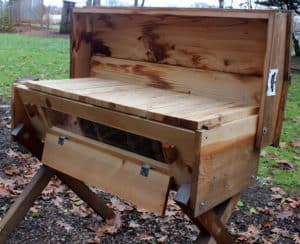
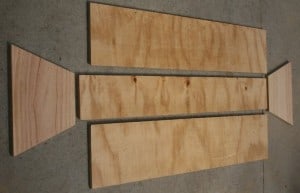
The dimensions of a TBH aren’t really that critical, the bees will occupy the space given provided it offers suitable volume for a colony and protection from the elements. I knew I wanted 2 hives, so I could compare and do a bit of manipulation if needed. Since hive dimensions aren’t particularly important and I didn’t want to put a lot of money into the project I based my dimensions on being able build 2 hives from a single 4’x8’ sheet of ply and some offcuts. There’s no shortage of plans available online and you’re only limited by your woodworking skills, imagination, and budget when it comes to adding aesthetic and functional features like screened bottoms, removable trays, viewing windows, hinged lids, peaked roofs and other luxuries.
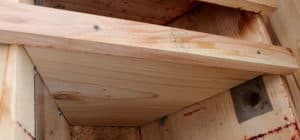
My goal was just to get some experience with bees in a TBH so I opted to keep it simple and came up with dimensions a bit on the small side so individual frames wouldn’t be too heavy when loaded with honey. I came out with a length of about 42”, a depth of 10” and a width of 16”. I cut the sides at an angle of 30⁰ to discourage the bees from attaching combs to the sides.
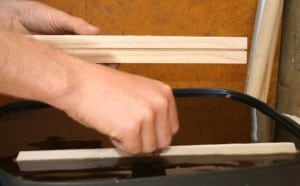
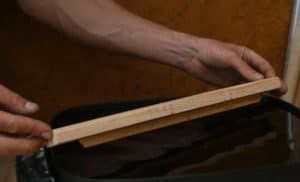
It is fairly important to get the width of the individual top bars correct to allow for proper bee space without brace comb binding everything together. I went with all 1 ¼” bars but have seen some recommendations to use a mix of 1 ¼” for brood and 1 3/8” bars for honey. I wanted to give the bees a ‘guide’ to encourage them start drawing comb in the “right” place. I cut a shallow groove lengthwise in the top bars to accommodate a 1/8” fillet of timber (popsicle sticks work too). I used hot wax to glue the fillet into the grooved top bar and then dipped the bottom edge of the fillet in wax to provide a primitive starter strip.
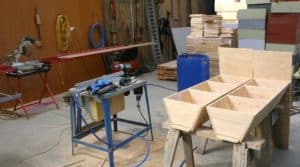
An alternative to attaching fixed guides in grooves is to glue a triangular guide or piece of waxed twine to each top bar. I also made a couple trapezoidal follower boards that fit the internal dimension of the hive. A follower board is simply a false back that can be moved to adjust the cavity space when new bars are added.
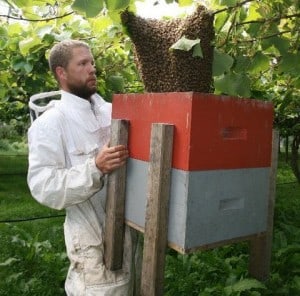
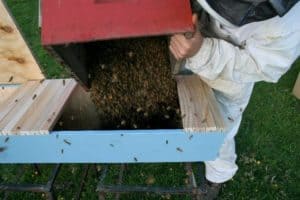
I grabbed a couple of swarms in bulk bee harvesting bins and left them in the shade until dusk. Once the bees flight had tapered off for the day I tipped the swarms from the bins into the top of the hive with a handful of bars removed and a follower board, confining them to the front 40% of the cavity space.
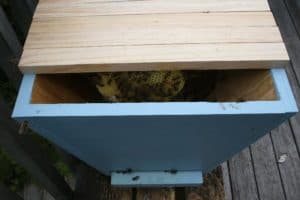
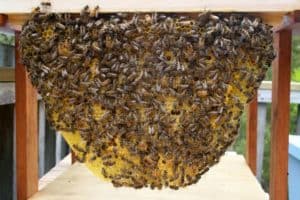
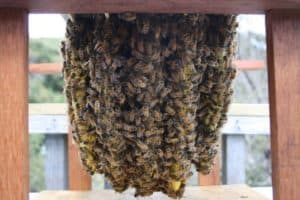
I gave them a little syrup to encourage them to stay put and build some comb. The next morning, traffic was slow but they seemed to be happy enough in the new space so I left them alone for a week to settle in. After a week I could see good traffic and steady pollen coming in so I figured they were on track. I popped the lid and removed the first empty bar revealing a small piece of clean new comb on the next bar and a slightly bigger comb behind that. A further look showed they had started drawing comb on 6 frames, everything tidy and parallel. After about a month when they had drawn all of the combs and population was growing I added new bars at each end of the brood nest and moved the follower board back to give them more space (think supering laterally instead of vertically).
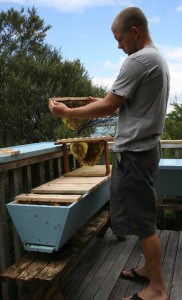
A top bar colony can be inspected and manipulated in a less invasive manner than a Langstroth which requires multiple boxes to be separated to gain access to the broodnest. In a TBH, single frames can be gently removed leaving rest of the colony intact, there’s also no need to wrestle with heavy boxes full of honey. The ability to look into the hives with minimal disturbance keeps the bees nice and calm and easy to play with without suiting up. They were outside my kitchen window so I was frequently poking around to indulge my curiosity but was generally pretty hands off as far managing the TBHs, simply adding bars and moving the follower board as the colony grew into the space.
I did harvest a few frames of honey but wasn’t looking for production from these colonies so I left most of it for the bees. When harvesting surplus honey from a TBH, full combs are removed and can be packaged as cut comb or crushed and strained. Because combs aren’t recycled after extraction, honey production for a TBH won’t match fixed frame where honey is extracted with comb remaining intact, but you will gain a nice quantity of quality beeswax. I treated for mites in the autumn with strips (Bayvarol- fluvalinate) tucked between bars. To set them up for winter I shrunk the cavity in accordance with the decreasing population and consolidated the honey at one end of the cavity adjacent to the broodnest instead of leaving honey on either side of brood. This allows the winter cluster to move laterally into the honey space as they consume it instead of moving one way and not being able to break cluster to get honey at the other end of the box. This one direction of movement is similar to how a Langstroth colony will move up into box of winter stores as they consume it. Both colonies came through the winter in good shape, one threw a swarm off and carried on. The second hive didn’t build well in the spring due to an average queen so I pinched the queen and boosted it with a couple frames of brood and eggs. A month later they had a new laying queen and both hives hit the second winter in good shape. I eventually left New Zealand and passed them on to a beekeeping mate but they continue to cruise along with minimal intervention. Overall it was interesting to observe colony dynamics in a different configuration and learn about alternative methods for keeping bees. I hope to use this experience in the future to volunteer with bees in places where budgets and access to materials make top bar hives an attractive option.