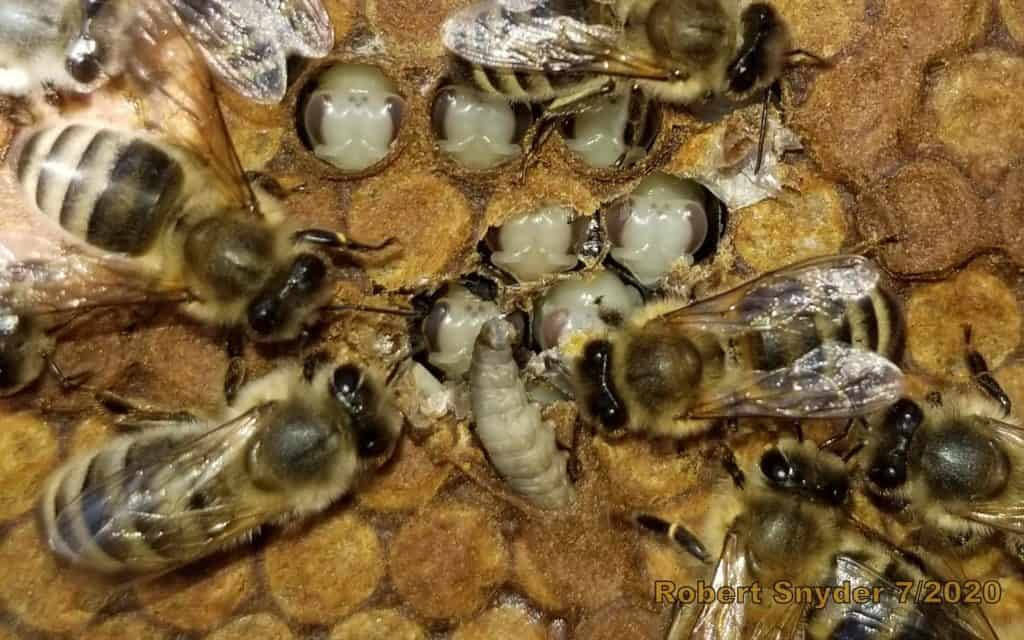
As a honeybee health field specialist, when I am assessing a colony’s health I look for irregularities in the sealed or open brood (Image 1 & 2). These irregularities may indicate the presence of diseases or pests. One common pest that can cause brood irregularities is the wax moth. Wax moth larvae develop underneath the honey bee colony’s brood cappings. The wax moth larvae often bind a honey bee pupa’s feet to the midline of the of frame, resulting in pupae that are not able to molt properly and therefore die in the capped cell before emergence.
When identifying and locating wax moth larvae in a brood frame, the first thing I look for are honey bee pupae that have been uncapped in a straight line. Usually, those pupae have developed heads and are in the purple eyed stage (Image 1). This symptom is coined bald brood. The pupa is often uncapped in a straight line with the next few cells being noticeably light as if the bees were slowly chewing the cappings (see Image 2). In contrast, I have also seen these lines of capped brood with the capping becoming dark brown.
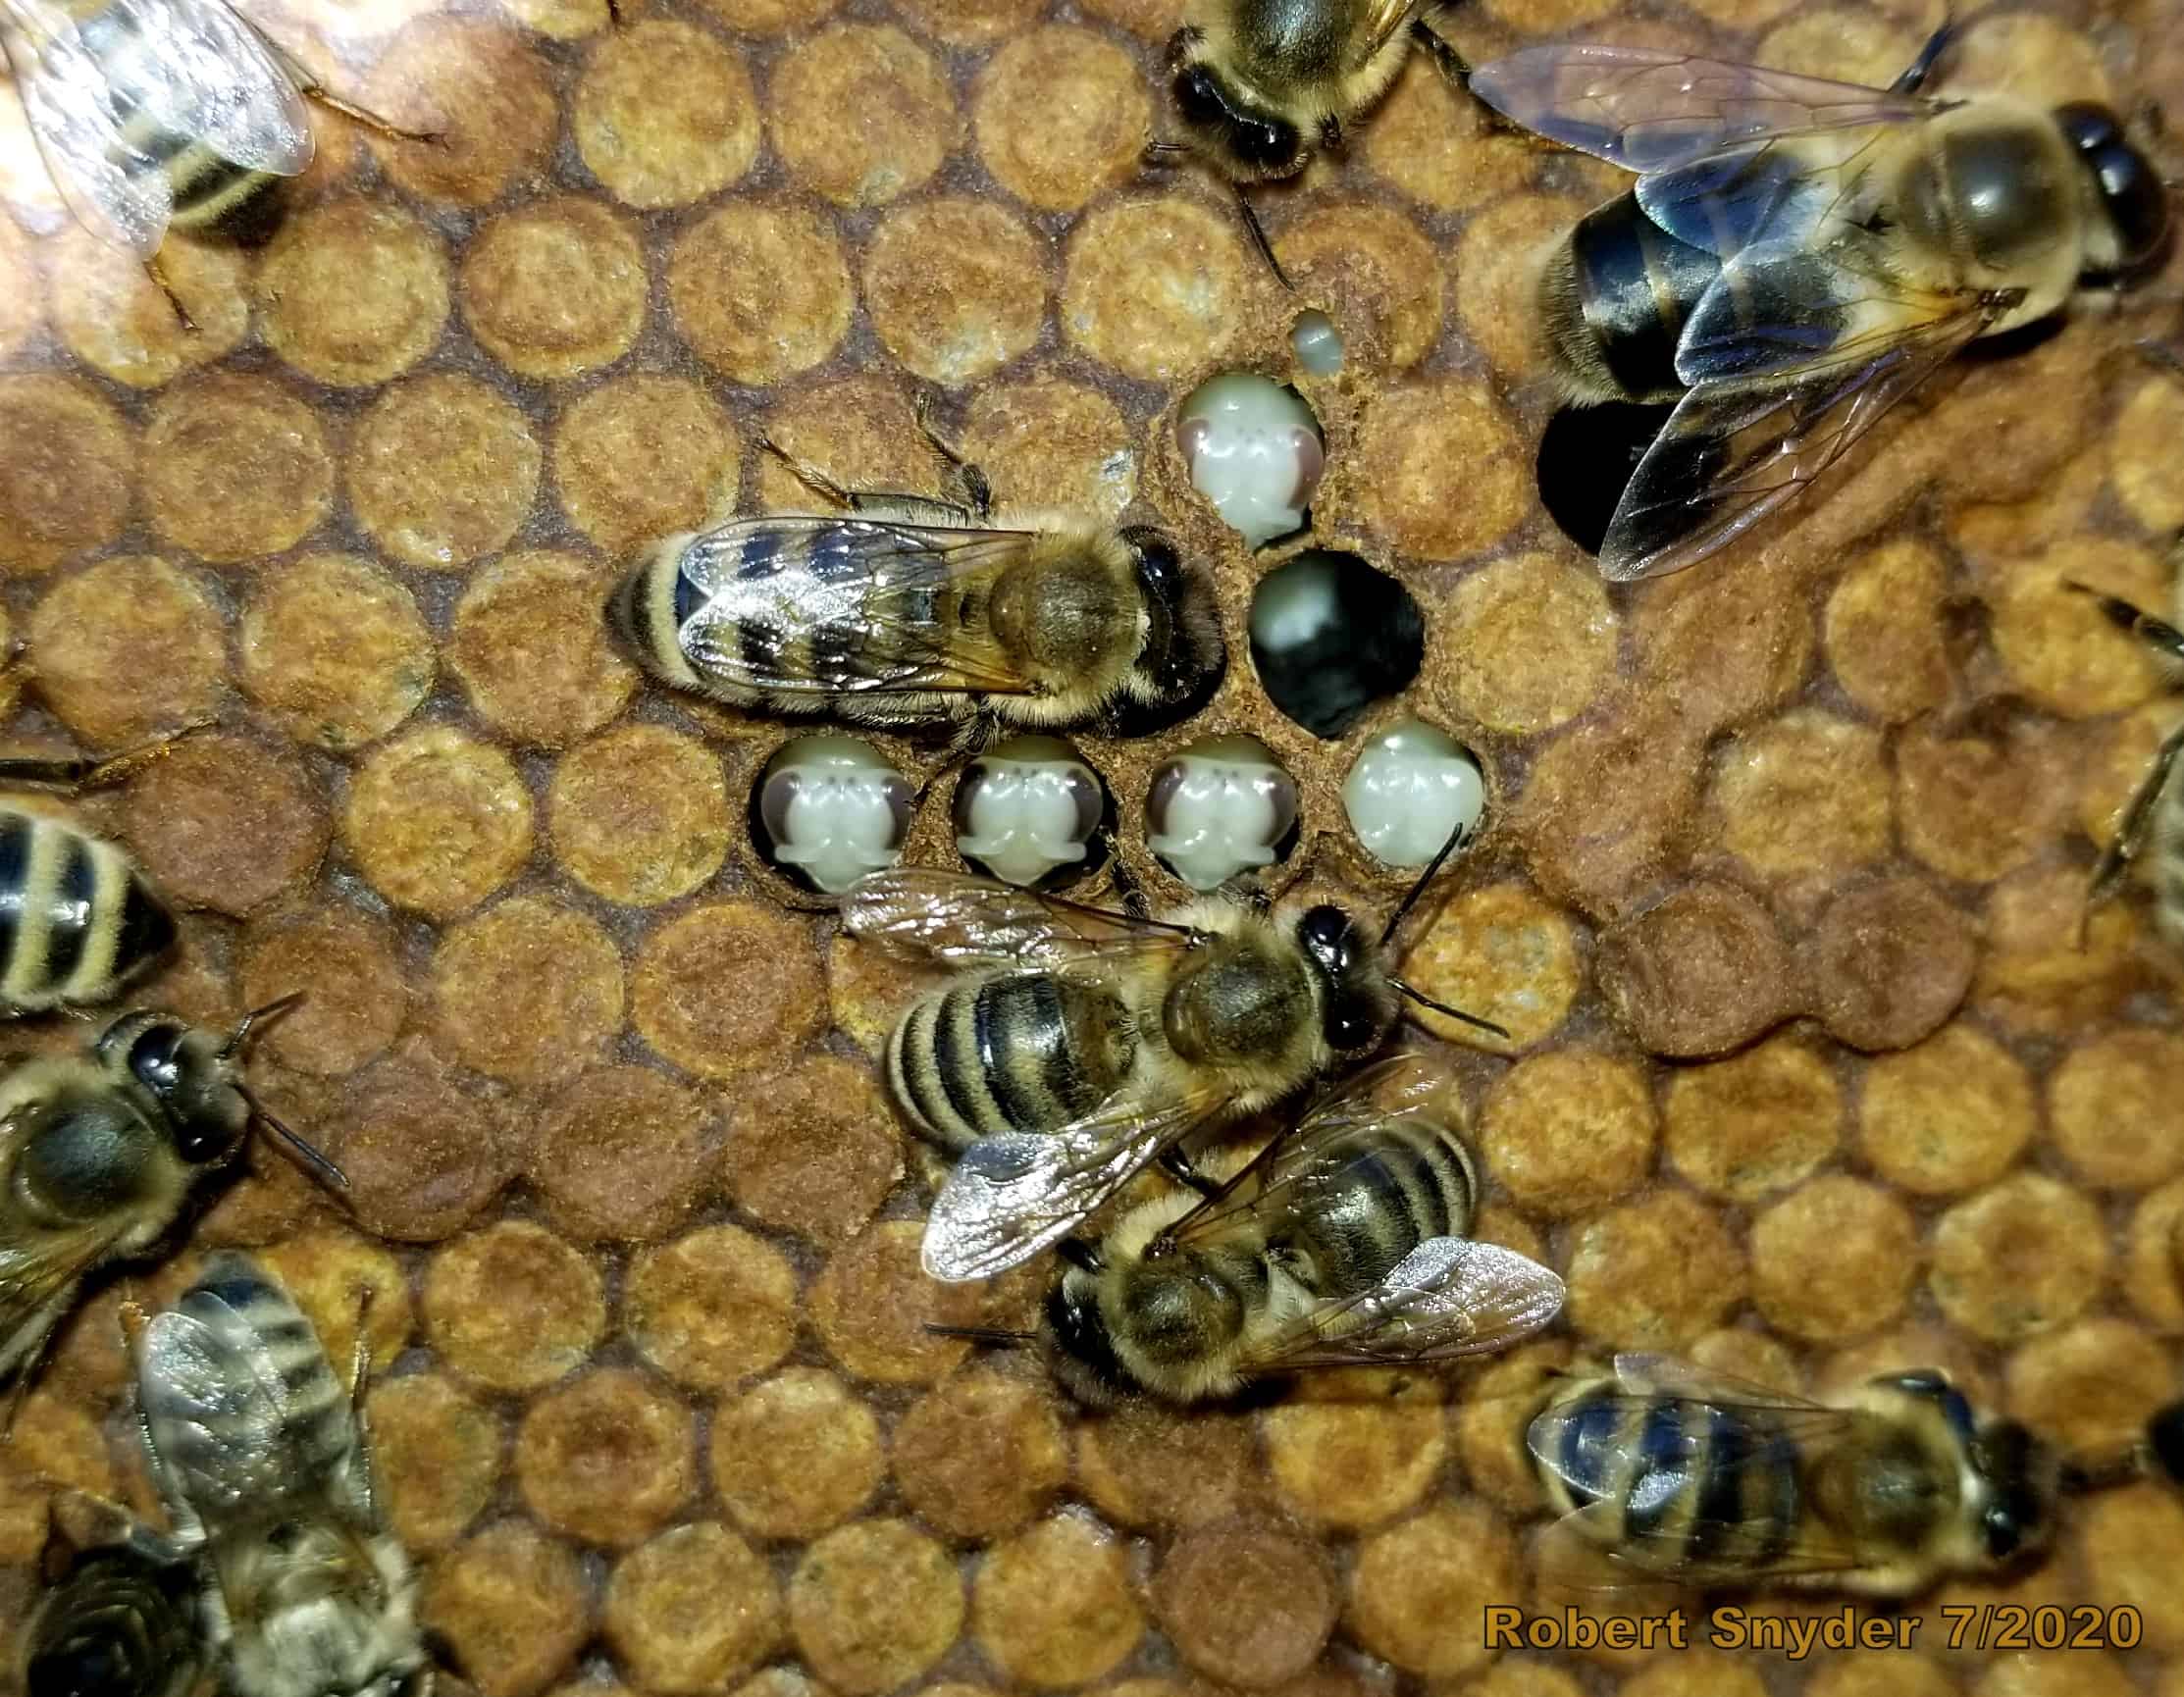
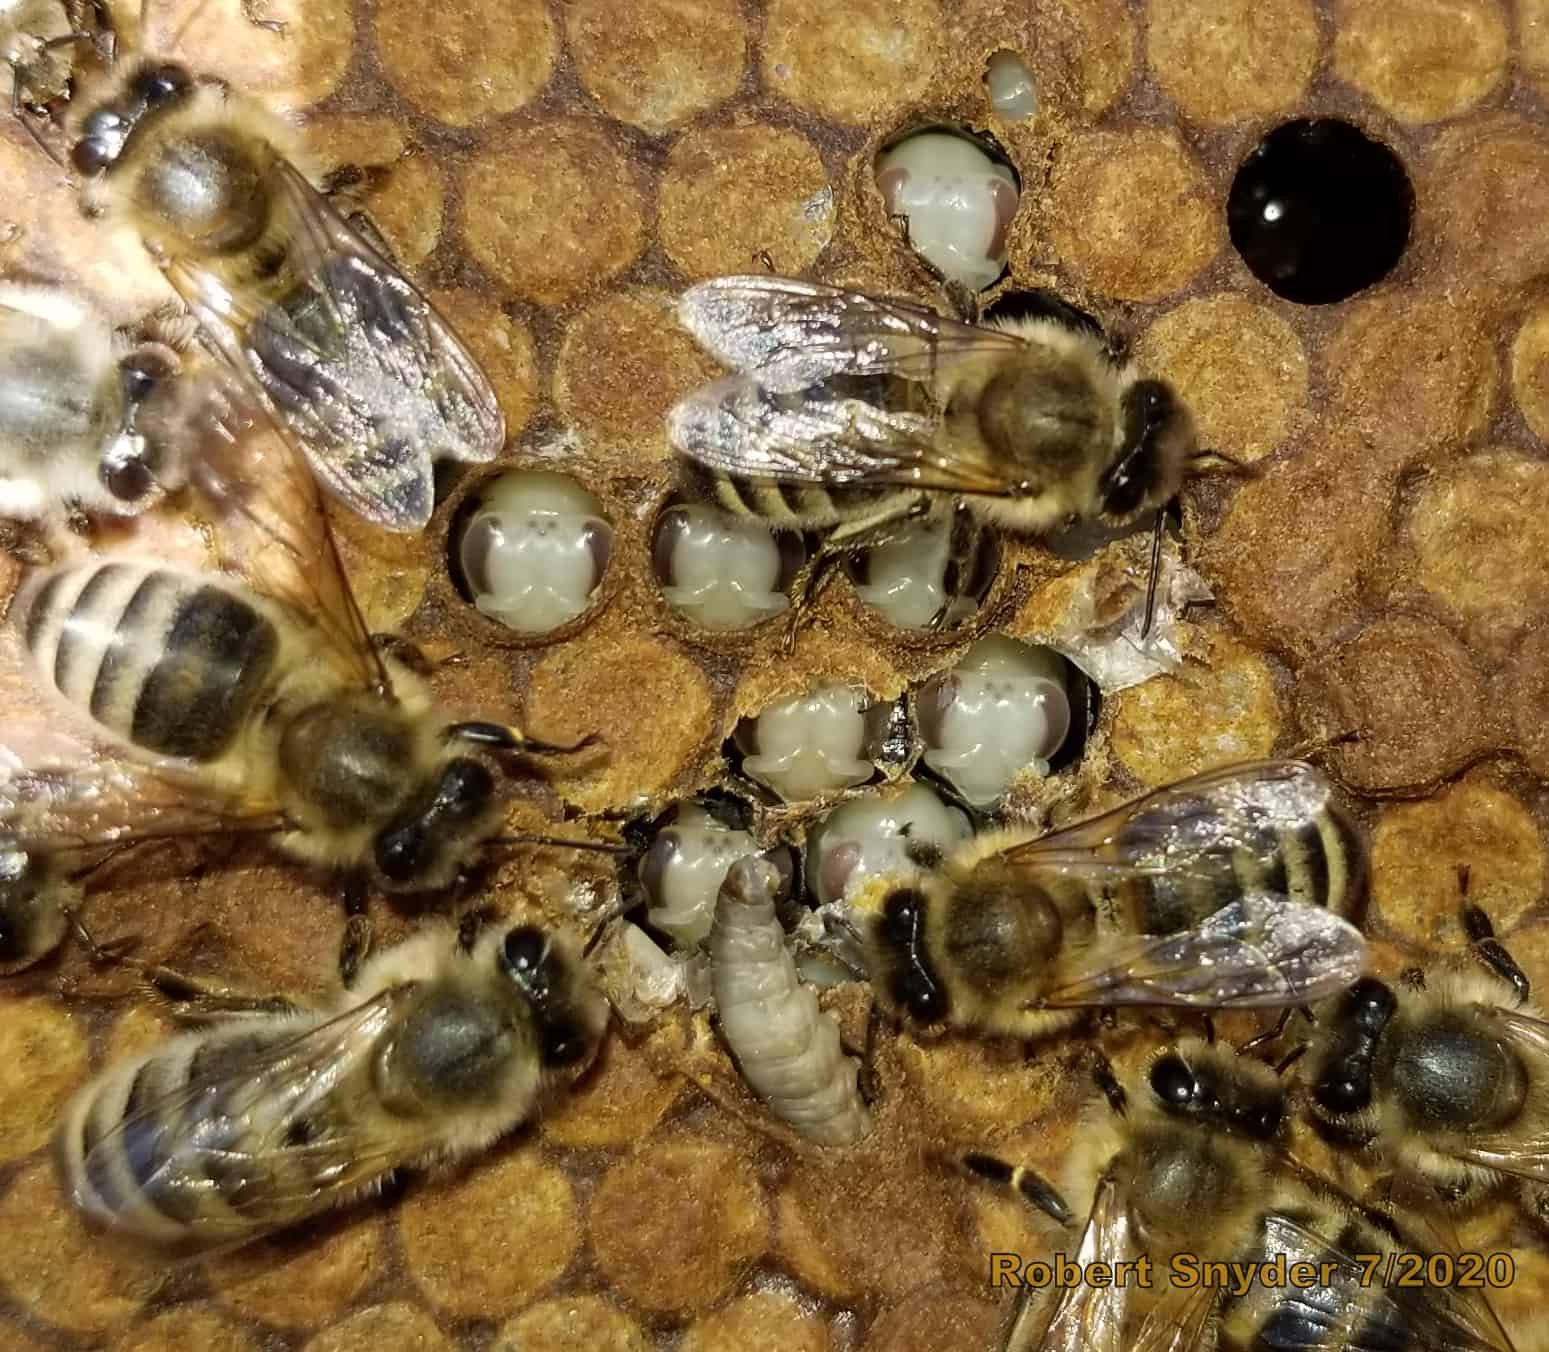
Another visual identifier of developing wax moths in colonies is when the capping is chewed down, appearing like the bee was trying to chew out of the cell (Image 2). This is actually caused by adult bees removing the wax layer on top of the capping containing the cocoon, as the bees have most likely detected the dead pupa below under the capping and are working on removing it. You often find these signs in older dark comb. (See images 1-4).

We see these same chewing behaviors on the 2nd day of hygienic testing where they often puncture the capping as opposed to just making it thinner. I would say having a hygienic queen is an advantage for combating wax moth and other diseases by removing them quickly. You can read more about bald brood and see additional images in one of my past blogs HERE.
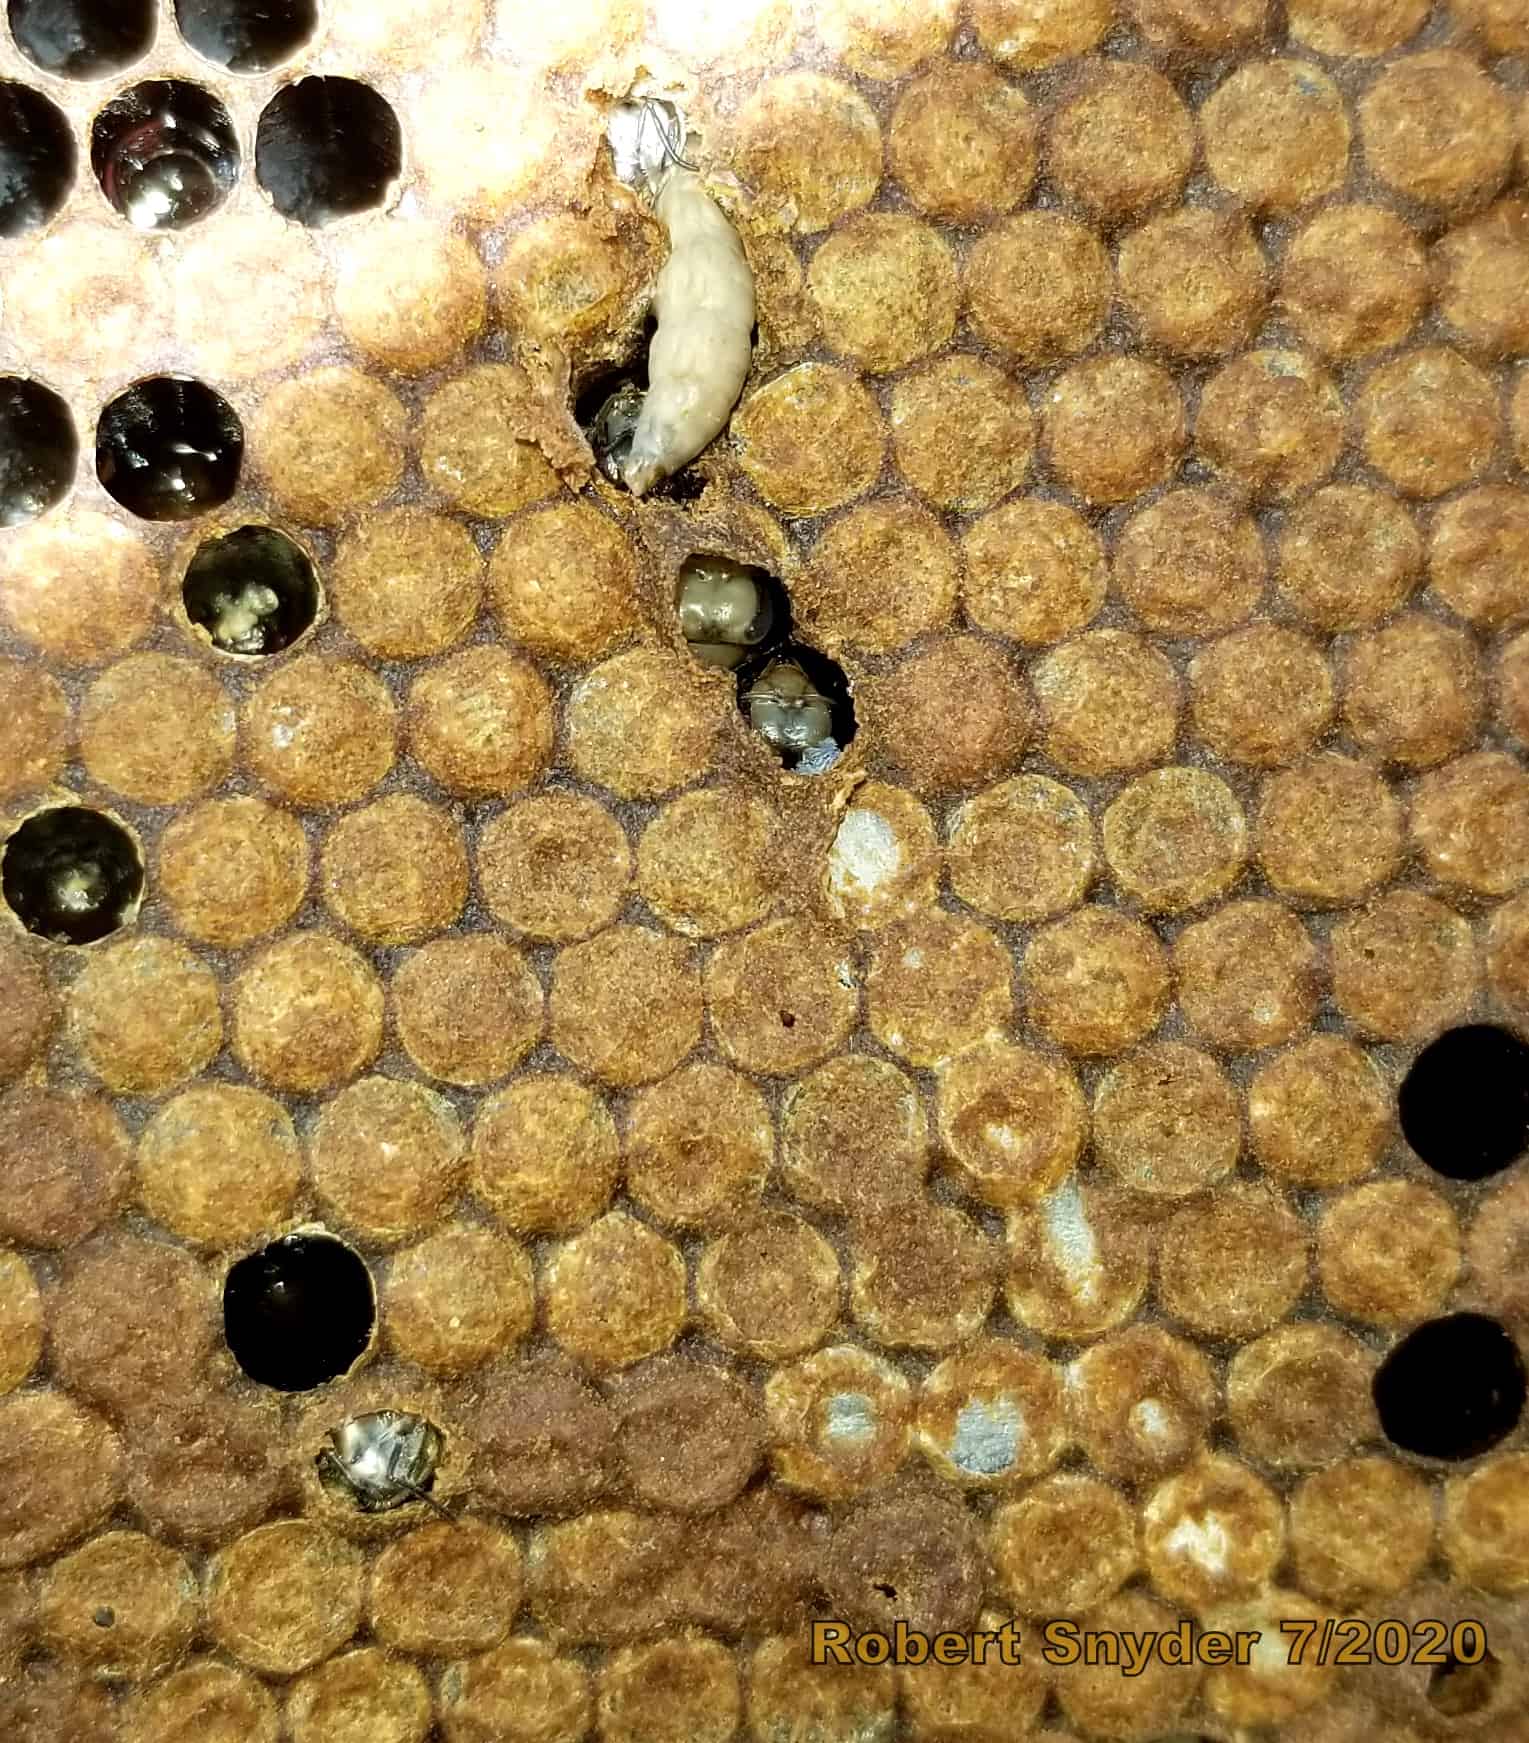
Once you’ve located the wax moth larva, the final step is digging it out with the sharp end of the hive tool. If you do a good job, you can get the larva out on the first try, but it does take some practice (shown in Image 3 & 4). I can usually dig out the wax moth larva from beneath the cappings on my first try, but sometimes it takes some more digging to find it.
Below is a video of me digging out a wax moth larvae. You will notice in the video that I have modified my hive tool so it is easier to use to uncap brood and dig out pollen, brood or wax moth larvae. For more information on how I modified my hive tool read MY BLOG HERE.
You may see more damage from the moths during the spring. If you only find one wax moth in a frame, do not be alarmed: just remove the larva and consider yourself lucky that it isn’t worse. This was most likely one wax moth larva that survived underneath the colony’s cappings. If you have a large area of silk built across the surface of the frames from thriving moth larvae, make sure you remove the older wax moth cocoons and any netting or tunneling removed from frames.
Healthy strong colonies and even smaller colonies can usually keep the wax moth at bay. Wax moths can be a problem for small colonies in the winter who cannot cover all of the comb. Wax moths usually prefer dead out equipment, so to prevent infestations in unused comb it is best to either store comb with fumigants, leave a light on 24 hours a day with comb exposed to the light and/or keep comb in a cold room or freezer.