One of the queen producers I work with, Joy Pendall, recently told me of some pest and flea problems she'd been having in a few of her yards. When she first told me about the damage these critters were causing I couldn't believe it - these mammals are not usually much of a pest for beekeepers to contend with, aside from occasionally chewing on the edges of bee boxes to wear down their constantly growing teeth. But Joy and her crew's stories and photos showed what an impressive amount of destruction that these little varmints managed to accomplish. The pictures (shared in this blog) show…
Author: Rob Snyder
I currently work out of the Butte County Cooperative Extension in Oroville, CA as a Crop Protection Agent. I received my B.S. in biology from Delaware Valley College, PA. There I attained a majority of my entomological knowledge from Dr. Chris Tipping and Dr. Robert Berthold. After graduation, I was an apiary inspector for 2 years at the Department of Agriculture in Pennsylvania. In my third year there, I still inspected some colonies but I mainly focused on The Pennsylvania Native Bee Survey (PANBS) where I pinned, labeled, entered data and identified native bees to genus species. Leo Donavall assisted me in learning the basics on positive Identifications of the native bees. Around the same time I began working on coordinating kit construction and distribution for the APHIS National Honey Bee Survey. I was also fortunate to conduct many of these surveys with fellow co-worker Mike Andree and Nathan Rice of USDA/ARS throughout California. All of these experiences have led me to where I am today, working to assist beekeepers in maintaining genetic diverse colonies resistant to parasites while reducing the use of chemical treatments in colonies. The BIP Diagnostic Lab at the University of MD is in an integral part of this process by generating reports in which we can track change and report to beekeepers vital information in a timely manner which may influence their treatment decisions.
Detecting Wax Moth Larvae in Frames of Sealed Brood
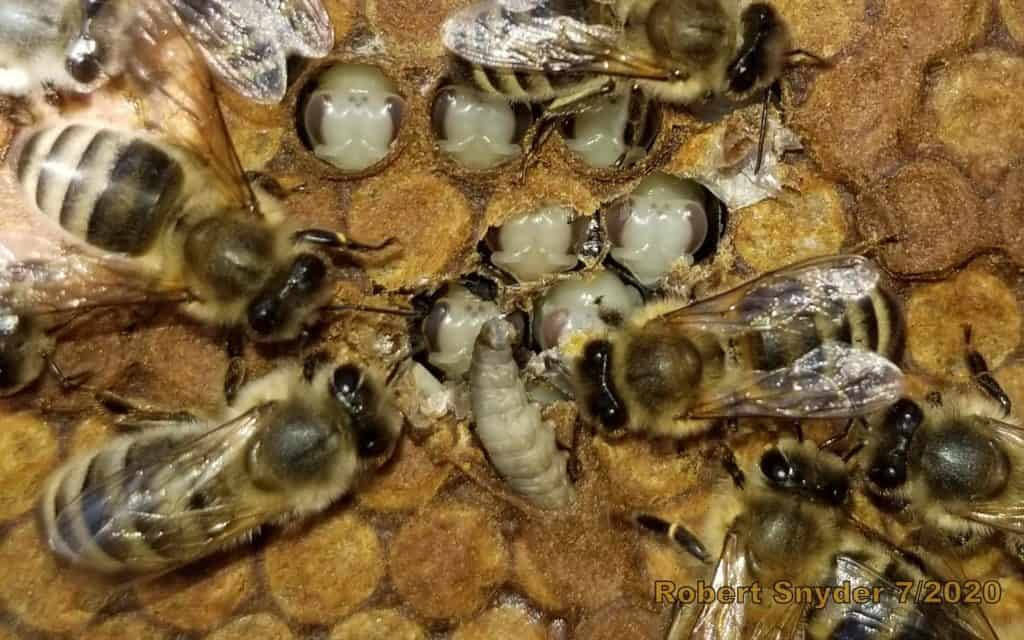
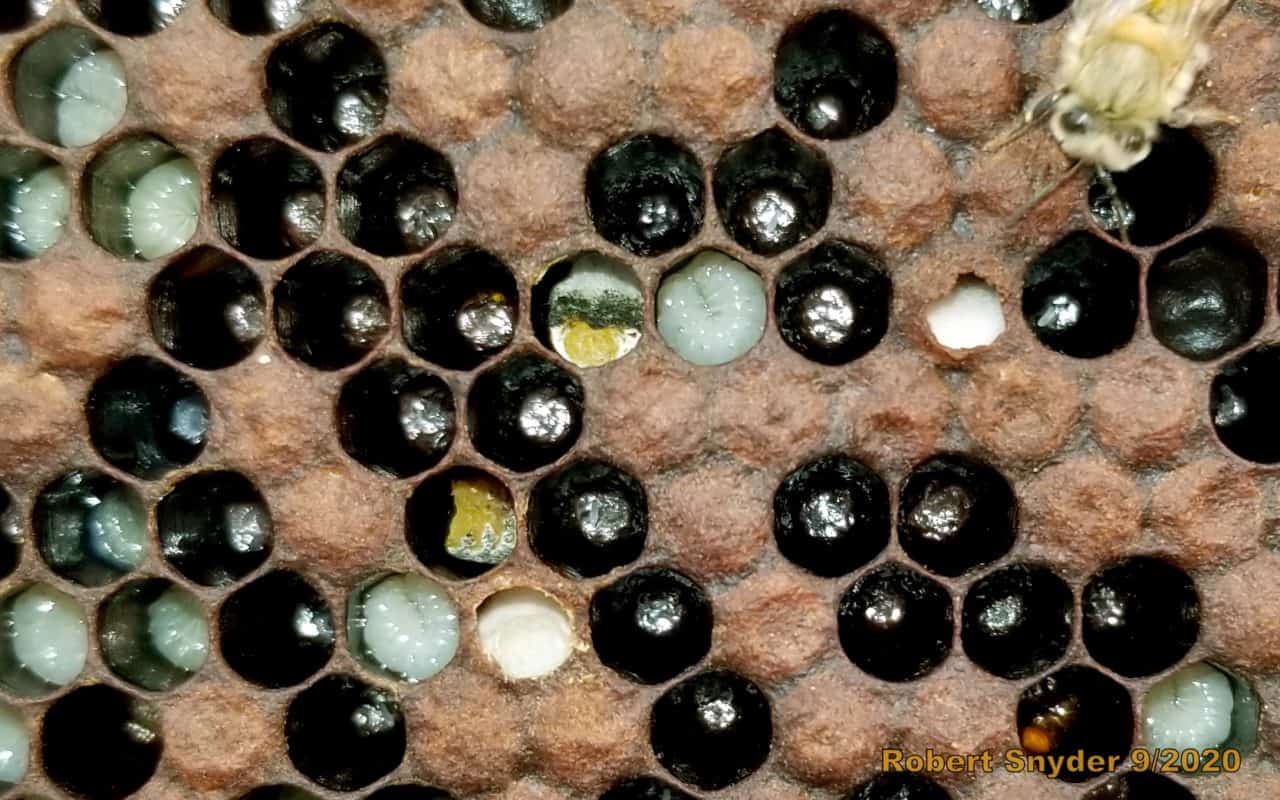
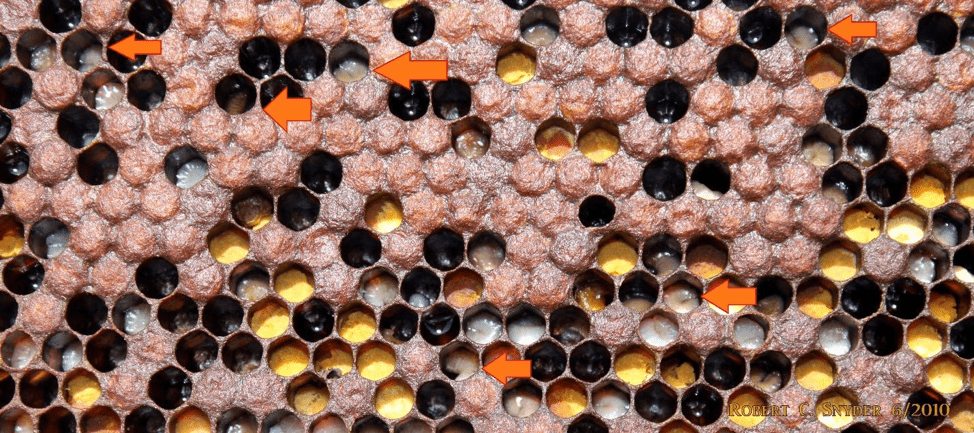
As a honeybee health field specialist, when I am assessing a colony's health I look for irregularities in the sealed or open brood (Image 1 & 2). These irregularities may indicate the presence of diseases or pests. One common pest that can cause brood irregularities is the wax moth. Wax moth larvae develop underneath the honey bee colony's brood cappings. The wax moth larvae often bind a honey bee pupa’s feet to the midline of the of frame, resulting in pupae that are not able to molt properly and therefore die in the capped cell before emergence. When identifying and locating wax moth larvae in…
Chalkbrood Disease Primer
When I started inspecting colonies for honey bee diseases in Pennsylvania in 2008, the first and most prevalent disease I found was chalkbrood. I observed this disease a few weeks into the spring season while inspecting a few colonies. I had seen the disease on several other occasions, so it was very easy to identify by the hard “chalk-like” mummies inside the cells. Ascosphaera apis is the fungus responsible for this bee disease. The exact origin of chalkbrood is unknown, but it most likely arrived from Europe with the alfalfa leafcutter bee (Megachile rotundata), when the bee species was introduced to assist with pollination demands…
The Challenges Of Setting Up A Small Case Study Experiment: Part I
This year, I vowed I would conduct one or two small case study trials to investigate some hunches I have had for a while. I am mostly curious about Oxalic Acid Sublimation (OAV) as a treatment against Varroa mites. Primarily I would like to investigate the recommended dosage. But before I can set this up as a valid experimental design, I need to set up some colonies to perform an experiment on. At the Bee Informed Partnership, we look at thousands of colonies each year, but we usually do not maintain our own. This year, I set up a small apiary and ran into some…
BIP Tech Team Field Agents as Early Alarm Systems
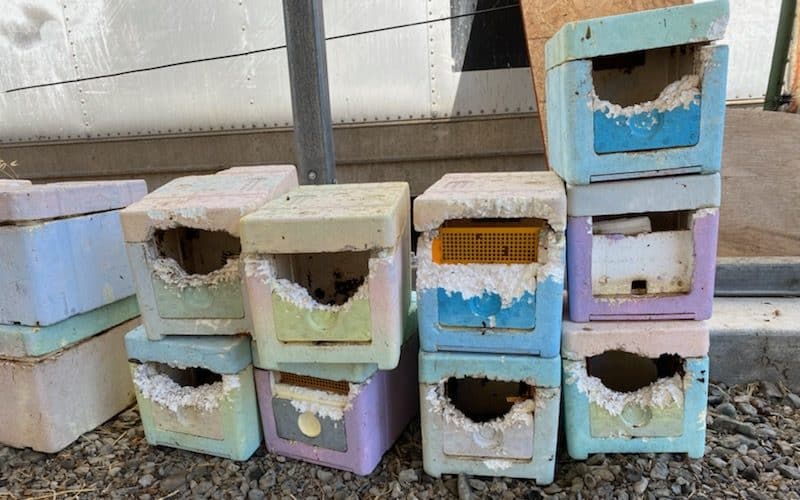
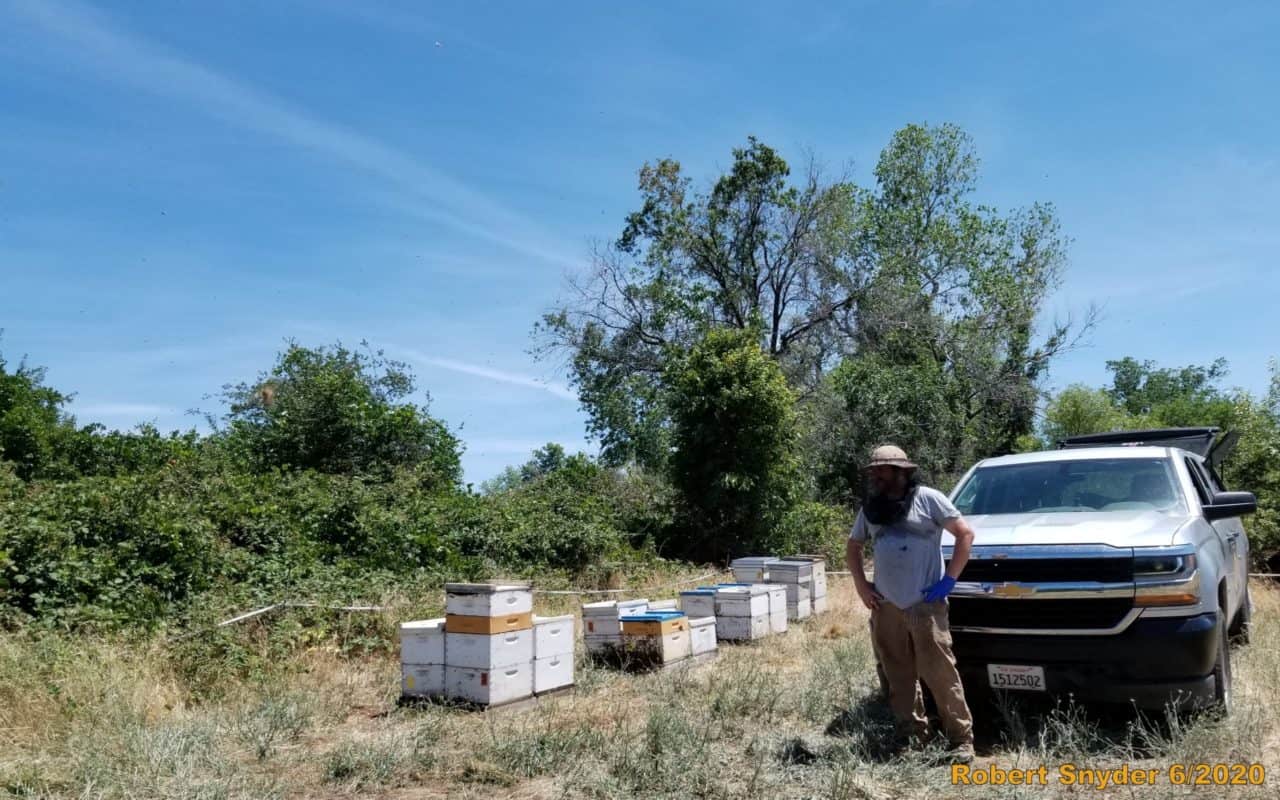
In Northern California this past spring, colony growth was slow due to the cooler weather. So slow in fact, that most Queen Producers started breeding up to a month late! Additionally, the numerous fungicide applications in the orchards accumulating on forage, may have been another factor impacting colony health and growth. The conditions were so wet this year, growers had to apply more aerial sprays to control fungus. Most of these sprays were performed during the daytime and most likely increase bee exposure to fungicides, especially in standing watering holes for bees, where pesticides may be present at higher levels. A week or so into…
The NEW Honey Bee Discovery Center in Orland
A few weeks ago, I was invited to the Honey Bee Discovery Center Kick-off and Exhibit Preview in Orland, California. This event was followed by the Queen Bee Festival the day after. The Honey Bee Discovery Center is ‘the first interactive exhibit and museum of its kind’. It highlights the history of beekeeping from hobbyists, sideliners and commercial operators’ perspectives, and features the evolution and breakthroughs in equipment, pollination and art inspired by bees. Inside the center, one can find multiple showcases of vintage bee equipment related to all apicultural activities, complete with an observation hive near the center of the room. All around the new…
2019 California Spring Update
Many California beekeepers reported that the start of this year was the worst in 20+ years. Several factors contributed to this year’s issues, starting with the numerous fires last year causing nearly 3 months of smoke in the area. Once the days got longer, queens started laying but the temperatures dropped again and egg laying stopped once more resulting in smaller colonies after almonds. In fact, most colonies were 2-3 weeks or even a month behind, which delayed the start of queen production. Many producers had to source bulk bees from beekeepers further south to begin starters, builders and nucs. Once queen producers started generating…
Spring Hygienic Testing and California Hygienic Score Trends
This spring we will start Hygienic testing Queen breeders’ colonies. This is my favorite type of testing for beekeepers because we get to look at the best performing colonies in the entire operation. The beekeeper we work with often selects the best hives throughout the year for performance and marks them, then in the spring the final selections are made from spring build up and how well the colonies-maintained size over the winter. It is best if the colonies are all in the same yard because it is easier to go through colonies quickly. Sometimes we test in almonds and have to move from pallet…
Making a Difference
Over the past seven years working with BIP, I have witnessed, first hand, improvements on the quality of the hygienic behavior in honey bee stock coming out of the Northern California Queen Breeders. Of all the variety of samples we perform as BIP Tech Teams, hygienic testing is my favorite because it means I get to look at the best performing colonies in each of the operations we work with. Over the years, I have noticed a decrease in the severity of European foulbrood, Chalkbrood and Sacbrood virus due to our collaborative efforts with the beekeepers in the program who select for hygienic behavior traits.…
2018 Northern California Update
Weather in Northern California greatly fluctuated this spring. It was in the 70 and warmer before the almond bloom started, then once the trees started blooming the weather turned cold. There were a few days when temperatures dropped to the low 20’s. These temperatures damaged the early pollinated almonds and will most likely affect the overall yields of early blooming varieties, which suffered damage by frost in some locations. We sampled many hives during the bloom and they were packed with pollen even though the bee flight hours were low due to cold windy weather. The weather also impacted the bee’s temperament, bees were more…